SSH Tunnel Management
Overview
SSH tunnels in Assimilate are reverse SSH tunnels initiated by the server to reach agent machines that are not directly reachable from the agent's side. This is distinct from SSH Agent Forwarding, which relays SSH authentication credentials so agents can access borg repositories without holding private keys.
Use SSH tunnels when:
- The agent machine is on the public internet (e.g., a VPS) but the Assimilate server is on a private LAN or behind NAT.
- The agent cannot reach the server's address directly due to firewall policy.
- You want the server to initiate all outbound SSH connections rather than opening inbound ports on the agent machine.
The server opens a persistent SSH connection to the agent machine and requests remote port forwarding. The agent then connects to the server through a localhost port on its own machine — no inbound firewall rules required on the agent side.
flowchart LR
    A[User Browser] --> B[Assimilate Server]
    B -->|SSH reverse tunnel| C[Agent Machine]
    C -->|localhost tunnel port| B
Creating a Tunnel
Tunnel management requires admin privileges. Navigate to the Tunnels page in the dashboard.
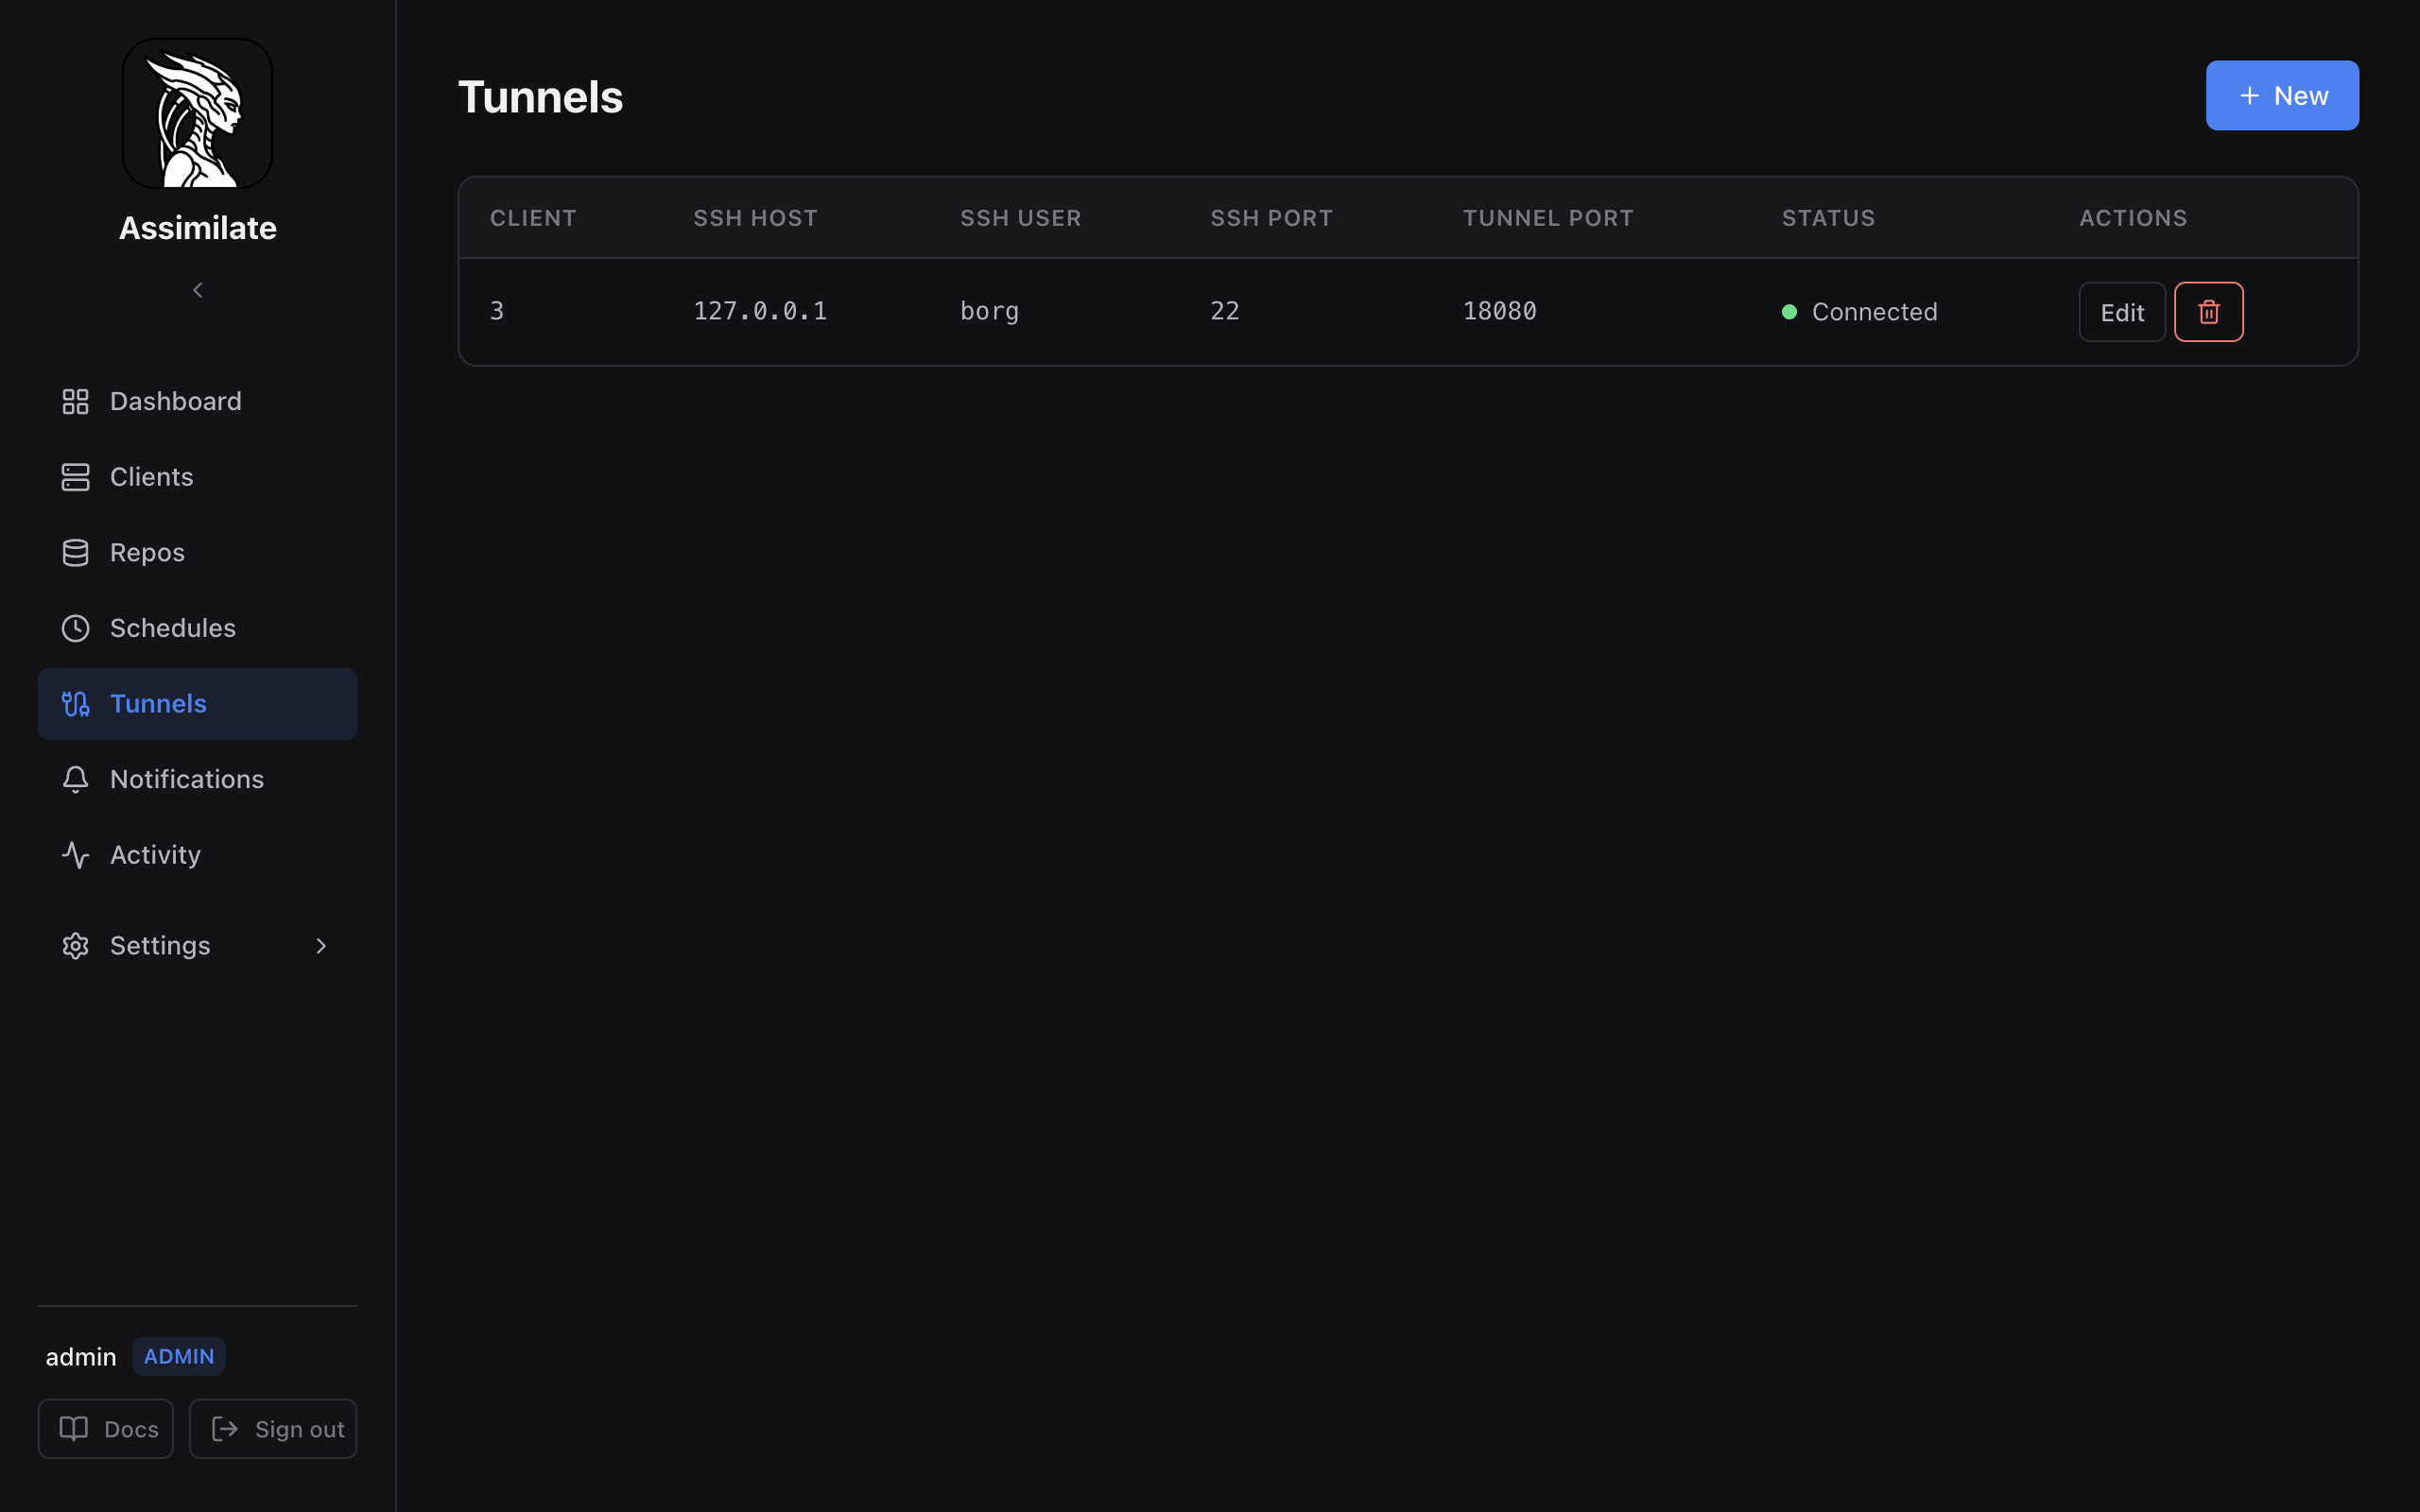
- Click New tunnel.
- Select the Host (agent machine) this tunnel is for.
-
Fill in the connection fields:
Field Description SSH Host Hostname or IP of the agent machine SSH User SSH user on the agent machine SSH Port SSH port on the agent machine (default: 22)Tunnel Port Port to bind on 127.0.0.1of the agent machine -
Leave Enabled checked to activate the tunnel immediately after saving.
- Click Save.
Once created, the server connects to the agent machine over SSH and requests remote port forwarding.
Install or update the agent from the host's Deploy dialog. Assimilate detects the enabled tunnel
and writes ws://127.0.0.1:<tunnel_port> and a generated token into the systemd service
automatically. Redeploying refreshes these values even when the custom systemd unit already
contains BORG_SERVER_URL and BORG_AGENT_TOKEN entries. No agent configuration is required
outside the UI.
The tunnel forwards connections to the address configured by ASSIMILATE_BIND_ADDR. Wildcard
binds such as 0.0.0.0:8080 and [::]:8080 are reached through the corresponding loopback
address inside the server process.
sshd requirement
The sshd on the agent machine must permit remote port forwarding. Verify /etc/ssh/sshd_config contains:
AllowTcpForwarding yes
AllowTcpForwarding local also works. Without this, the tunnel will fail and show an error status in the UI.
SSH key authorization
The server uses its Ed25519 key pair (the same key shown under System in the admin UI and used for SSH Agent Forwarding). Add the server's public key to ~/.ssh/authorized_keys on the agent machine:
# On the server, print the public key:
ssh-add -L

# Add the output to ~/.ssh/authorized_keys on the agent machine.
Tunnel Lifecycle
Each tunnel has one of the following statuses:
| Status | Meaning |
|---|---|
| Connected | SSH session is active; remote port forwarding is bound |
| Reconnecting | Session dropped; server is waiting before retrying |
| Disconnected | Tunnel is disabled or has not been started |
| Error | A non-recoverable error occurred (e.g., auth failure, invalid port) |
Auto-reconnect
When a connected tunnel's SSH session drops, the server automatically attempts to reconnect. The retry delay starts at 1 second and doubles on each failure, capping at 120 seconds. The server sends keepalive packets every 15 seconds (up to 3 missed keepalives before treating the session as dead).
Manual reconnects and configuration changes wait for the previous SSH session to close and release the remote forwarding port before opening a replacement session.
Tunnels in an Error state (e.g., public key authentication rejected) do not auto-reconnect — the error must be resolved and the tunnel re-enabled manually.
If the tunnel is Connected but the agent cannot connect, redeploy the agent (see
Redeploying an Agent) and verify that ASSIMILATE_BIND_ADDR
identifies an address assigned to the server host or container.
Server startup
All enabled tunnels are started automatically when the server starts. A small random jitter (50–500 ms) is applied between tunnel starts to avoid thundering-herd reconnects after a server restart.
Use Cases
Reverse SSH tunnels are useful when the network topology prevents the agent from reaching the server directly:
- Agent on public internet, server on home network — The server can SSH out to the VPS; the VPS agent cannot reach the server's private IP.
- Strict egress firewall on agent — Only outbound SSH (port 22) is allowed; the agent cannot open a WebSocket to the server's port.
- Multi-site deployments — Agents at remote sites connect back through tunnels without requiring VPN or firewall changes.
See Agent Management for how to register agent machines, and Repositories for configuring borg repositories on those machines.
Security Considerations
Tunnel ports are local-only
Tunnel ports bind to 127.0.0.1 only on the agent machine — never 0.0.0.0. The forwarded port is not reachable from outside the agent machine. Any process running on the agent machine can connect to the tunnel port, so treat the agent machine as a trusted host.
- Admin-only: Creating, modifying, enabling, and deleting tunnels requires admin privileges. Regular users cannot manage tunnels.
- Server SSH key: The server authenticates to agent machines using its Ed25519 key pair. Protect this key — anyone with access to it can open SSH sessions to all machines that have authorized it.
- Principle of least privilege: Use a dedicated SSH user on the agent machine with minimal permissions. The user only needs to be able to log in and bind a local port; no shell access to sensitive resources is required.
- Audit: All tunnel state changes are broadcast to connected admin UI sessions in real time.
See Security for the broader security model.
Viewing Active Tunnels
The Tunnels page lists all configured tunnels as cards, with a summary row at the top counting tunnels by status (Connected / Reconnecting / Needs attention). The status indicator on each card updates in real time via WebSocket — no page refresh needed.
Each card shows:
- The agent this tunnel belongs to, and its current status
- A small connection diagram between the agent and the SSH host, coloured and animated by status
- SSH connection details (user, host, port) and the tunnel port
- Reconnect, edit and delete actions
Closing a Tunnel
Manual disable
Edit the tunnel and clear Enabled. The server immediately cancels the SSH session and marks the tunnel as Disconnected. The tunnel configuration is preserved and can be re-enabled at any time.
Delete
Click Delete to permanently remove the tunnel. The SSH session is cancelled before the record is deleted. This cannot be undone.
Automatic behaviour
There is no automatic expiry. Tunnels remain active until explicitly disabled or deleted. If the server restarts, all enabled tunnels are reconnected automatically.